Manage User Access
Employers are responsible for managing users within their secure account. MyAccount lets you control who can access your WCB information and what they can do.
Each user has a role that determines what they can see and submit. Your MyAccount administrator is responsible for making sure the right people have the right access. This includes providing third-party providers with relevant access to your claims information and ensuring users are disabled from your account as individuals change roles within your organization.
If you’re unsure what level of access to assign, check with your organization’s privacy, security, or HR team.
Find the information on this page to manage user access in MyAccount:
User roles
| Role | What they can do |
|---|---|
| Account/Policy Administrator | Full access to all claim and financial information, including managing users |
| Full Access | Full access to all claim and financial information, but cannot manage users |
| Assessment Only | Access, create, and submit policy financial information, and view clearance letters |
| Claims Only | Submit and view return-to-work and claim information only |
| Injury Report Submission | Submit injury reports and worker earnings forms |
| Injury Report Create | Create (but not submit) injury reports |
| Contractor | View contractor lists and clearance details |
Only Account or Policy Administrators, Full Access, and Claims Only users can view claim-related information and letters.
Add a new user
Follow these steps to add users to your account, including employees in your organization and third-party providers. Be sure to the types of roles and permissions to ensure you are applying the right level of account access.
Note: If you are adding a third-party provider to your account, please provide them with your company domain email address for easier access management.
- Select the policy that requires a new user account
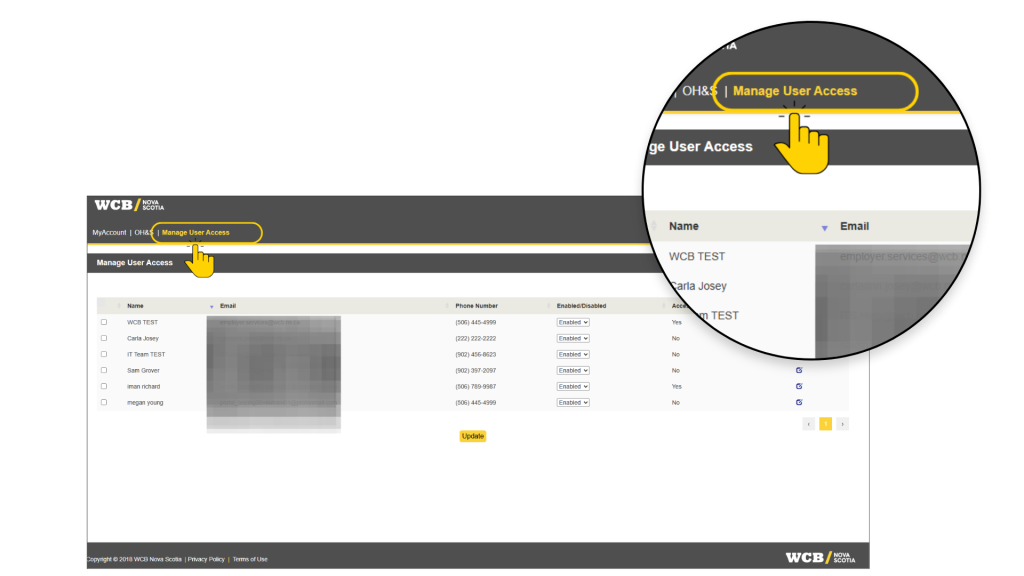
- Go to Manage User Access
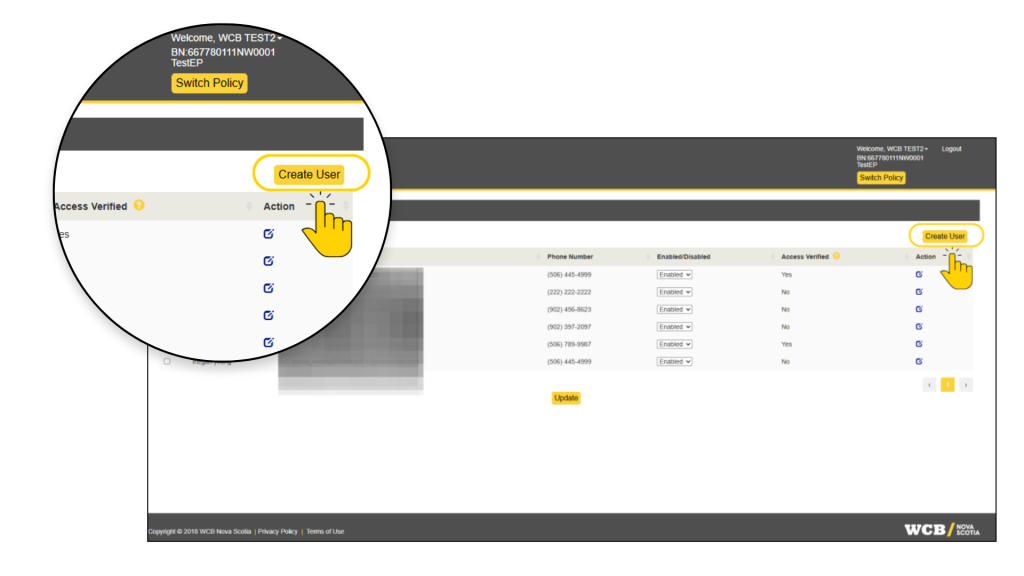
- Select Create User and enter the person’s name and contact information
- If you receive an error message indicating that the user already exists, please follow the steps below. Otherwise, proceed directly to step 4:
- Select Click to View User, then add the policy to the existing profile and assign the appropriate access level
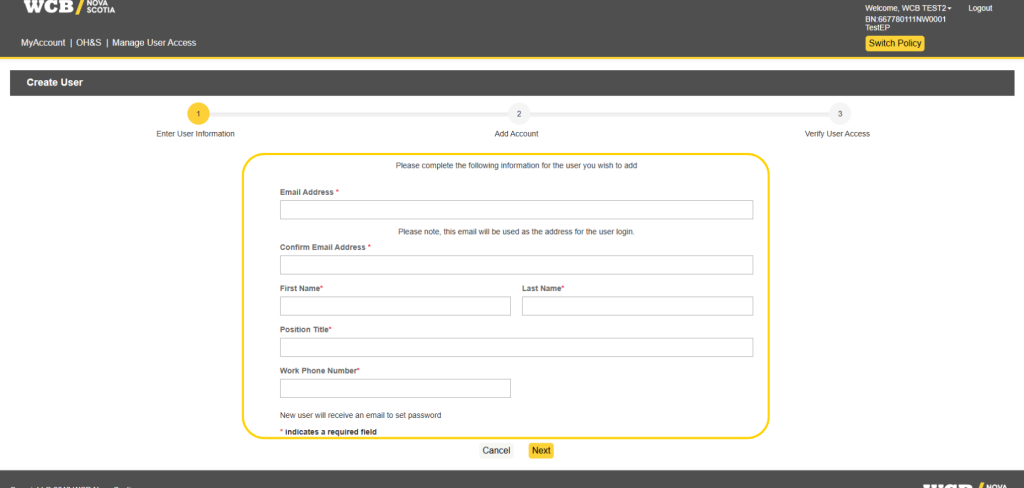
Screenshot of WCB user-management portal showing Step 1, “Enter User Information,” within a three-step Create User workflow. White form outlined in yellow includes fields for email confirmation, name, position title, work phone number, password-reset notification option, and Cancel/Next controls.
- To Add a Policy and select Add Policy
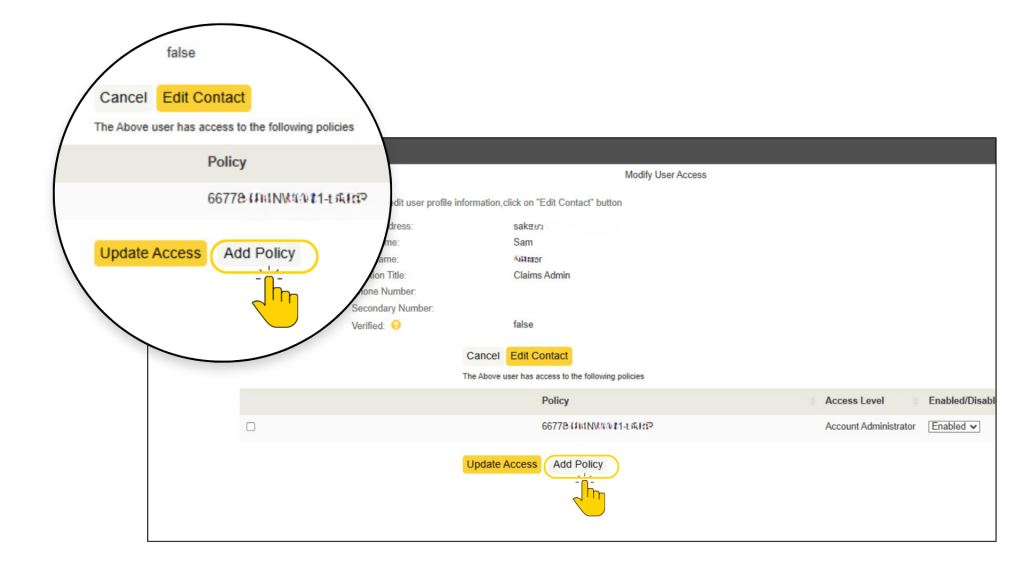
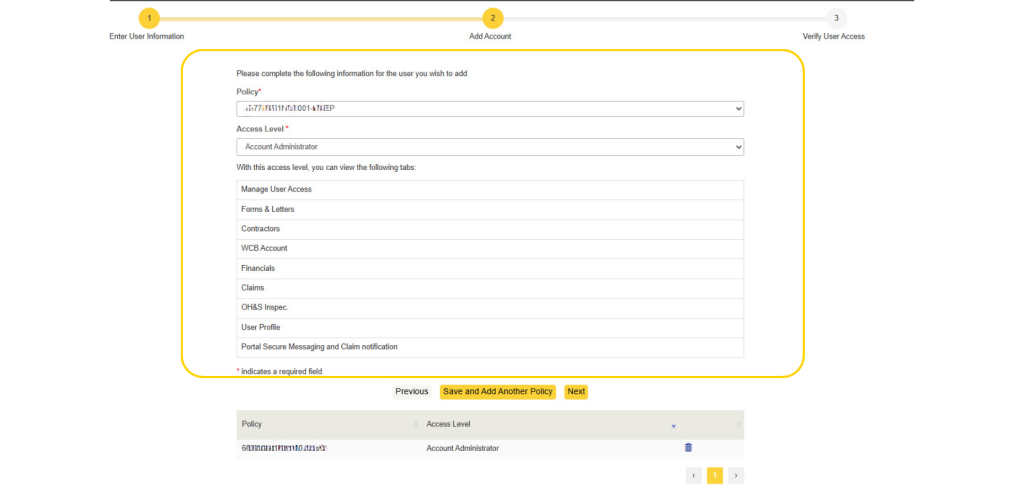
- Select the policy for which you want to grant access and choose the appropriate access level for the user and select Add Policy
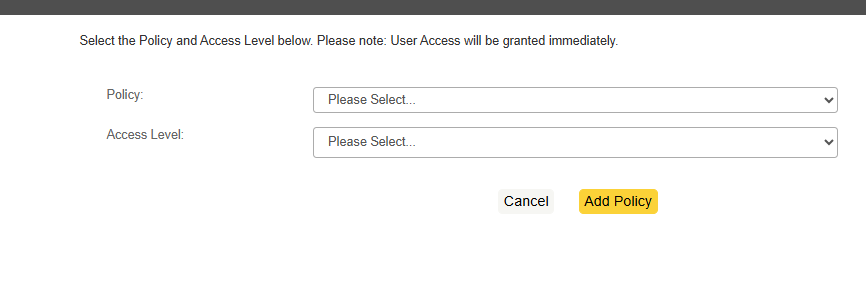
- Select Click to View User, then add the policy to the existing profile and assign the appropriate access level
- If you receive an error message indicating that the user already exists, please follow the steps below. Otherwise, proceed directly to step 4:
- The policy will be added to the access table. Once you have verified the details, select Add Policy to save your change
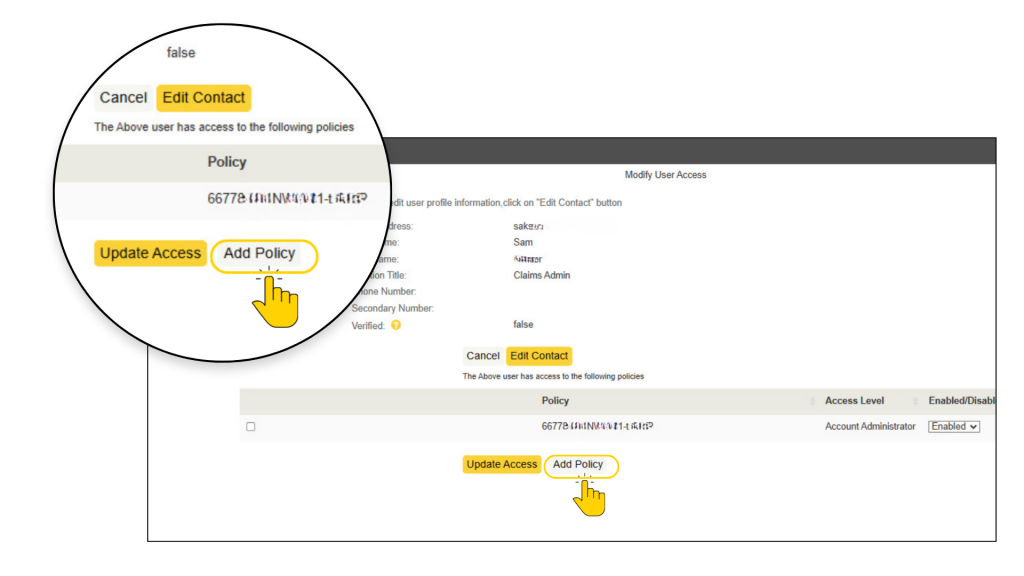
- Select their access level and assign any relevant policies
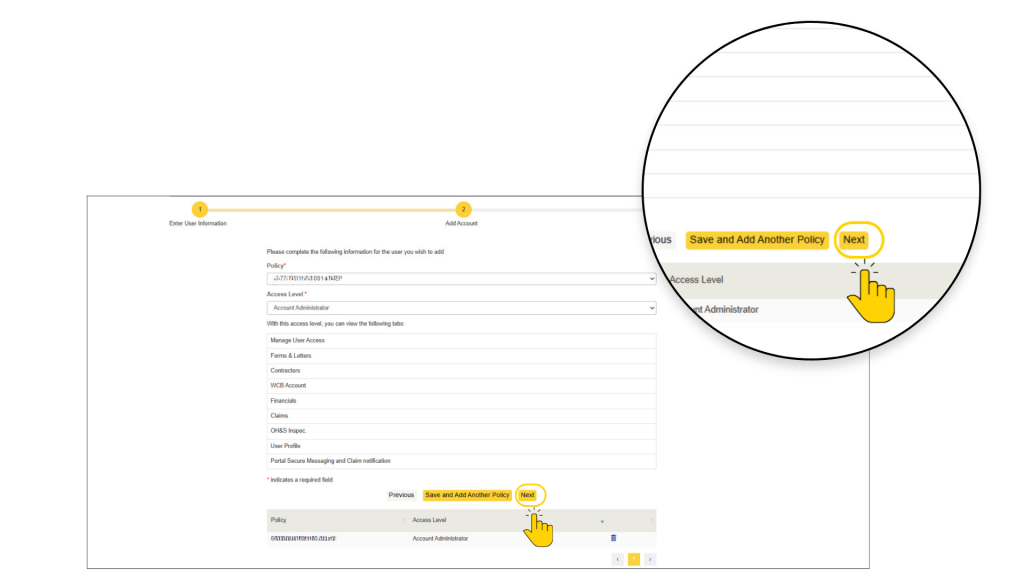
- Select Save and Add Another Policy (Follow the Step 5 and 6 if you want to add the user in another policy)
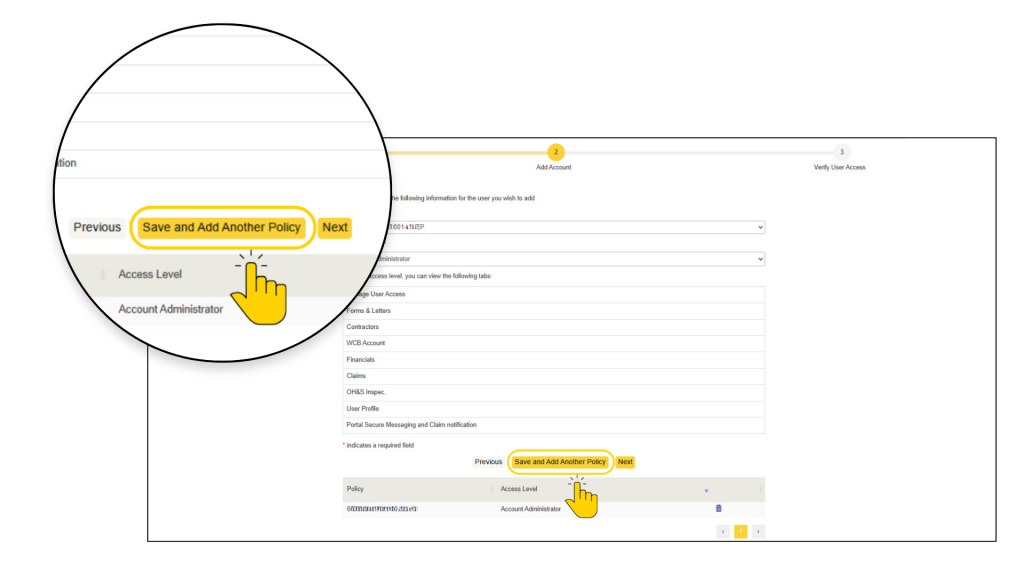
- Select Next to confirm
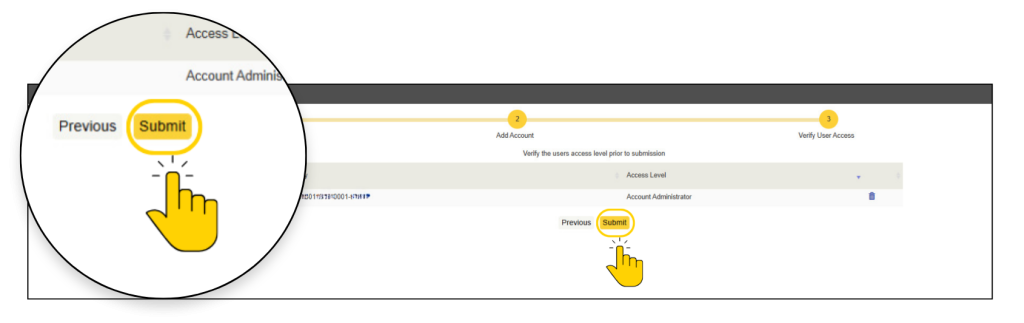
- Select Submit
- Select “OK” when the “Update in progress” message pop-up appears.
New users who have not previously registered for MyAccount will receive an email containing a temporary password. Before setting a permanent password, they must first sign in using the temporary password. The system will then prompt them to create a new permanent password.
Note: The activation link expires after 24 hours. If the link has expired, the user can select Forgot Password on the login page to receive a new password reset link.
Important notes
- Use a hyphen for names such as Mary-Lou or Jean-Luc
- Do not enter two names separated by a space
- If you have trouble adding a user, call 1-800-870-3331
Manage existing internal users or third-party providers
Employers on MyAccount are responsible for maintaining user access for their MyAccount policies. It’s important to review and adjust permissions regularly so you control who has access to what information. Whether you are adding an employee at your organization, or a third-party provider supporting your claims administration, the steps for managing user access are the same.
From Manage User Access, you can:
- Review or change a user’s access level
- Disable/Enable a user
Review or change a user’s access
- Log in to MyAccount and select the relevant policy
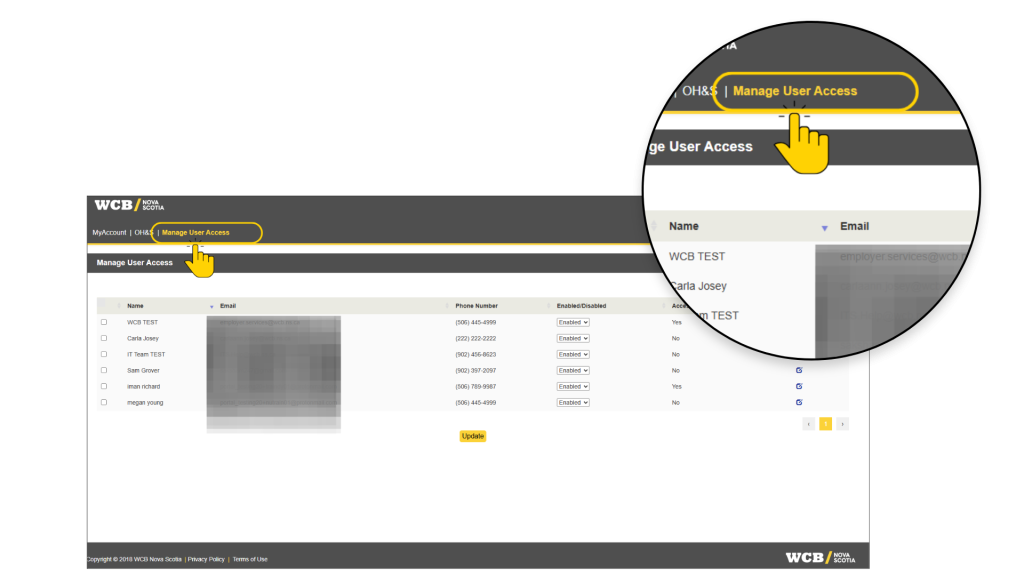
- Select Manage User Access and look for the user
- You need to select the “Action” button to change access permissions for an individual user. Check the Enabled/Disabled button to verify the user has not been disabled from all the policies, and select the Action button next to the username to review each policy assigned to the user
Important: Do not edit user permissions using the “Enable/Disable” button on the Manager User Access screen. Doing so will change user permissions across all policies as opposed to at the individual policy level. For third-party providers, this may impact their access to other employer accounts. Account Administrators should adjust user permissions at the individual policy level
For example, if User A has access to Policy BN1 and Policy BN2, including policies belonging to different employers or third-party consultant accounts, selecting Enable or Disable from the Manage User Access page will apply the change to both policies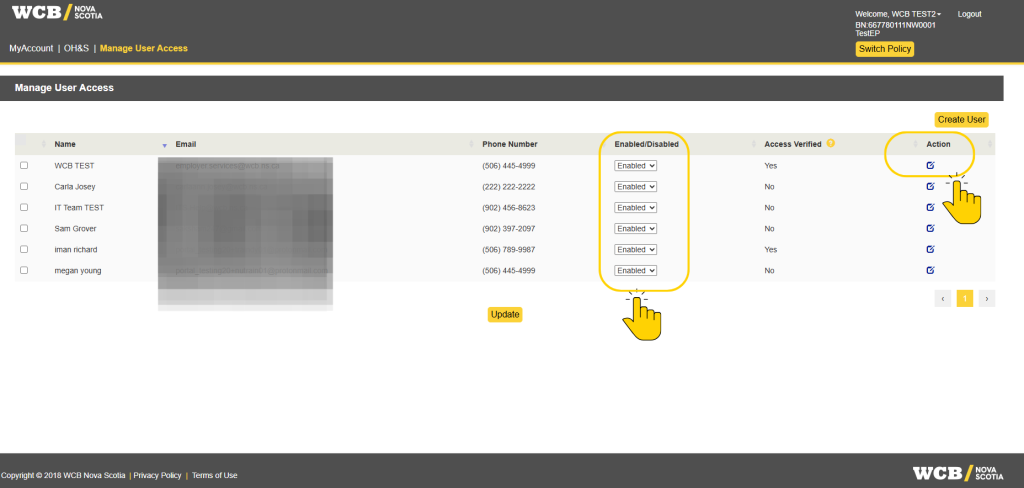
- Once you select the Action button, you can review all the policies assigned to the user. Review the user access and re-enable or disable their access for the selected policy as needed.
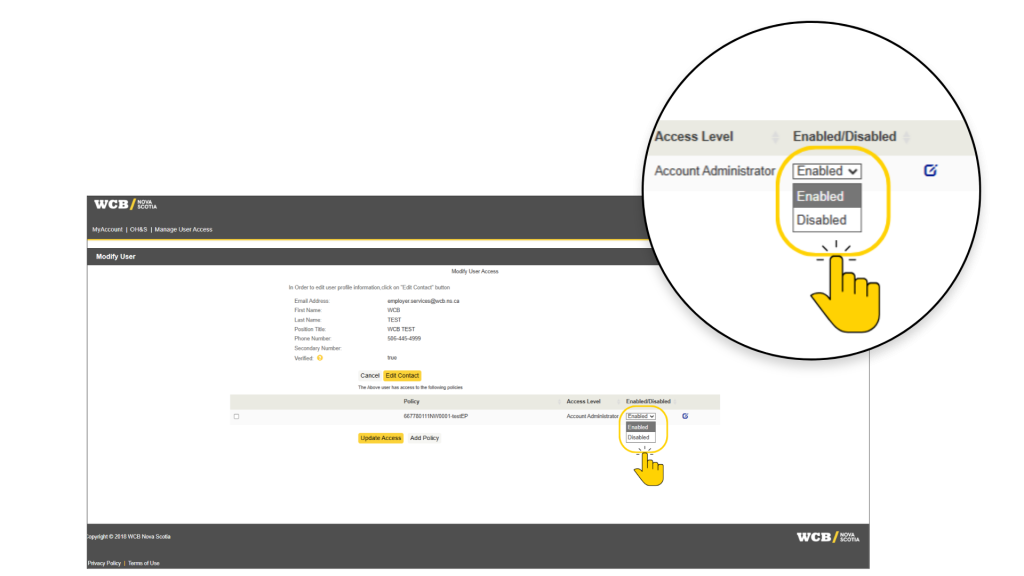
- Select Update Access to save all changes
Change User Access level
- Select Manage user access and look for the user
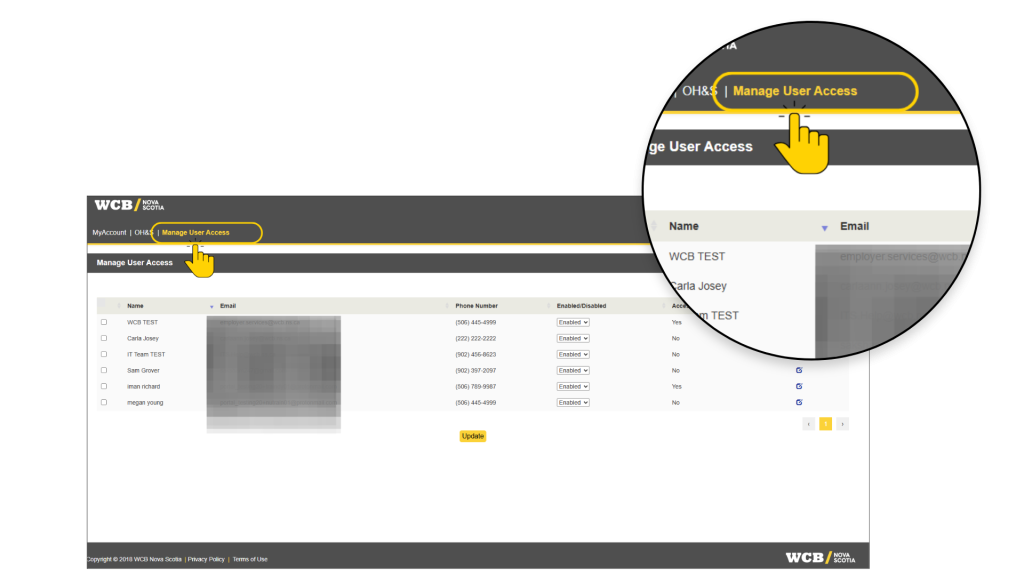
- Select the Action button next to the user name to review their policy access level
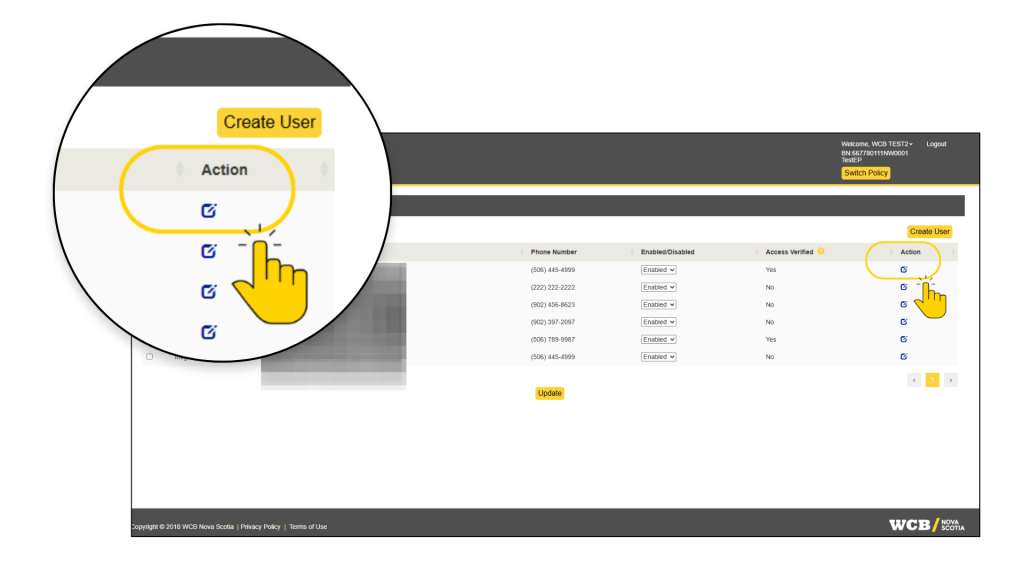
- Select Edit button to review their policy access level
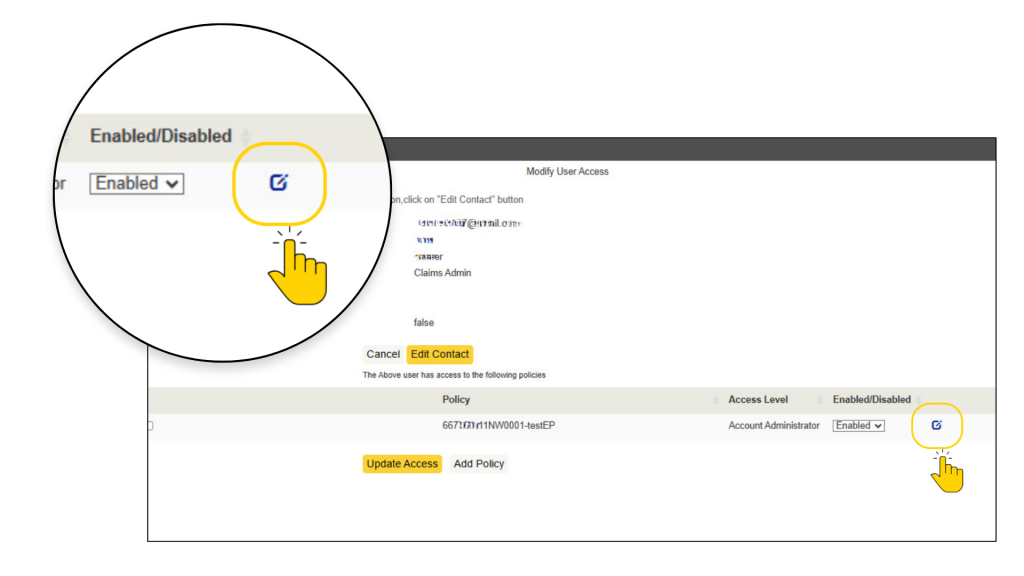
- Select the user access level from the dropdown, such as MyAccount Administrator or MyAccount Full Access
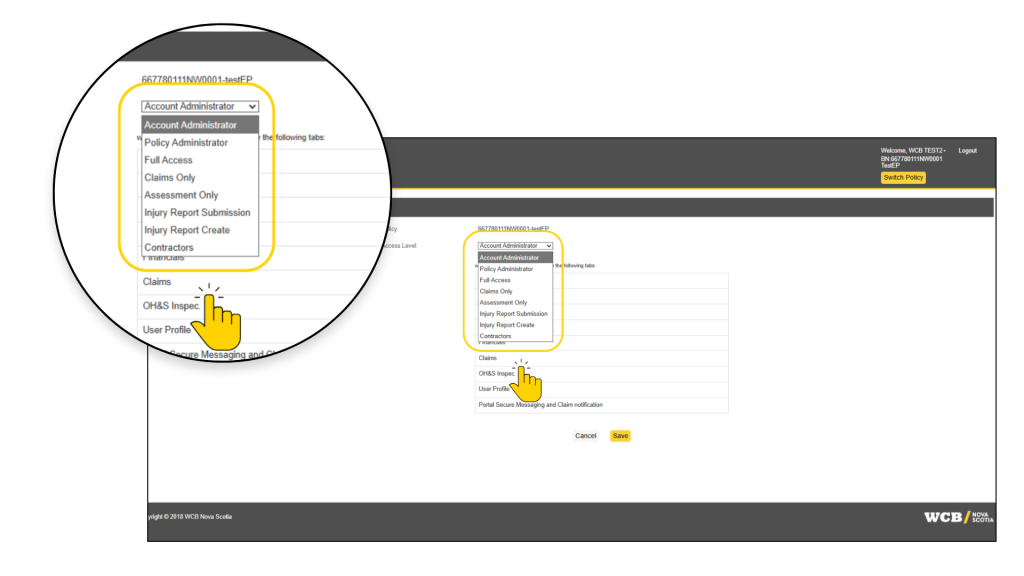
- Select Save
- Select Update Access
What happens if third-party users or MyAccount users are not able to access their account or see any policies in their MyAccount?
The most common reason for this issue is that the policy administrator has disabled your account. Please contact your policy administrator and request that your access be re-enabled for the applicable policies.